Tuesday, August 31, 2010
Wheel Assembly
Easier than I thought! The plans show you how to make the assembly from metal. The kit has the pieces made and they go together like love and marriage. A little pressure needed to push the spindle down over the wheel bolt in order to tighten or loosen onto the wheel. The steering arms (twisted pieces) have a larger hole that fits on the wheel axle. Don't forget to put the steering rod connector (little black piece with a hole in the end for the rod) on the inside of the bracket when inserting the long 8" bolt.
Steering column
Drill, baby, drill! After measuring over from the cross tube, align the hole on the circumference of the axle by lining up with tube or wood dowel threaded through the steering column tee. Remember, you didn't glue the tee, so it is adjustable.
Next, order the 1" cap that you couldn't find at Home Depot. I found it and 1 1/4" plugs at Aubuchon Hardware, www.hardware.com.
Saturday, August 28, 2010
Tuesday, August 24, 2010
Steering - axle cap
Added the cap to the wheel support for the axle assembly. After viewing the photos on the website, I finally grasped the concept of the 1/8" off center hole in the top to attach the wheel spindle and the hole in the side. By placing a rod in the hole in the side, you can turn the non-glued cap, rotating the off-center hole closer or further to the frame, thus aligning the wheels vertically. You want them slightly tilted inward. Photos of this when I'm done will show it much better. Meanwhile, photos are on the website, under SideKick way at the bottom, under another link to photos of others, I think.
Monday, August 16, 2010
Tires and wheels
Not much time this weekend due to the running and jumping of little feet. However, I got the tires and wheels put together with the help of 8 year old Skyler. I bought to 1.25" caps to finish the wheel attachment to the axle, and did some research on foamcore/gatorboard for the custom body exterior. Special credit to Pete Luiz (Petey) who walked by my desk, saw the photo of the frame and suggested the lightweight foamcore for the outside body. Gator board is much sturdier than foamcore but costs about 3 times as much at Walser's Art Supply. Online is cheaper.
Scrap PVC makes good beach toys or an erector set for kids.
Tuesday, August 10, 2010
Top building
Here is the built top. I customized from the original plan to be longer. Before gluing, I assembled it on top of the supports and marked the joints with tape. I even measured and cut the pieces as I assembled to make sure of the fit. Then I added the surf racks on top.
Here is the difference between schedule 40 and class 200 PVC. The inside diameter is the same, the thickness, therefore the outside diameter is thinner/smaller.
Top materials
Here is the top!
4 class 200 1.25" x 2' ($1.48 ea.)
5 class 200 1.25" x 3' ($2.22 ea.)
4 1.25" side outlet 90s (90 degree angle Tee) ($3.12 ea.)
1 invoice
1 pocket size constitution of the United States (?!)
shipping $19.87
total: $49.37
I finally found that FlexPVC.com, the site that carries kits for americanspeedster.com has the "schedule 20", aka class 200, PVC. I will figure out the canvas-weatherproof material for the top later.
Here is the "side outlet 90". Better than sliced bread! Makes a corner for the top and connects to the vertical support coming up.
Let's go build!
Sunday, August 1, 2010
Frame with 3 Roof Supports
Here's the frame with side metal rod supports, wood dowel support in the back axle, most joints glued, and all three roof supports. I found a place to order schedule 20 PVC and some 90 degree Tees for connecting to the support in the corners and the two sides at 90 degree angles. I'll get a photo when it's here.
The schedule 20 PVC is called Class 200 on the website from which I ordered. It sounds like the same thing. I hope it is.
I had to redesign the top to be longer, plus an extra pipe going across above the roof for surfboard racks. Again, photos will do a lot more than words.
The schedule 20 PVC is called Class 200 on the website from which I ordered. It sounds like the same thing. I hope it is.
I had to redesign the top to be longer, plus an extra pipe going across above the roof for surfboard racks. Again, photos will do a lot more than words.
When you cut pieces of tape off the roll, you normally hold the roll with one hand, pull out with one hand, and cut with another hand...if you have 3 hands. Here's my tape cutting machine. (an upside down hack saw between the knees) Tape the joints so that you can pull the frame apart and glue back together exactly how you had it.
Reducer Bushing
The original plan calls for a flat head plug with a hole drilled to bolt the metal guard plate into the frame. Home Depot doesn't have any. The plan said you could use a reducer bushing. How does that work? With a washer at the small hole end, it holds the bolt. Another worry about customizing the plans abated.
Tools
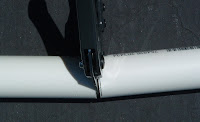
I could have saved some skin and blood vessel bruising if I had bought the mallet before I started pounding PVC pipe together. The right angle is necessary to square connectors along a pipe where connecting pipes go in perpendicular directions. The pipe cutter is fairly easy to use and convenient, but the second photo shows that the blade pushes the pipe apart, thus cutting a slight angle at the bottom of the cut. It hasn't caused a significant problem when glueing.
Metal Support rod
How do you get a 10'6" metal fence rail top cut in two and fit into a PVC tube? I had my doubts. But it went swimmingly. My hack saw did a good job of cutting it in half. After pulling the back off, removing the wood dowel in the back axle, it slid all the way in down to the front axle. One dubious task out of the way.
Subscribe to:
Posts (Atom)